My rabbit’s housing has gone through four eras: a store-bought starter cage (metal bars on a plastic base), a DIY pen built from wire grid panels, a stretch of full free roaming, and finally the setup we’ve stayed with — a DIY enclosure built from opaque square panels, two panels tall, with a partial ceiling and even a little mezzanine platform he hops onto for treats.
If you’re shopping for a rabbit playpen right now, this post is the shortcut through those four eras — especially the second one, because the product most people buy first (the wire/mesh grid pen) is the one that quietly fails at its main job.
Era 1: the starter cage
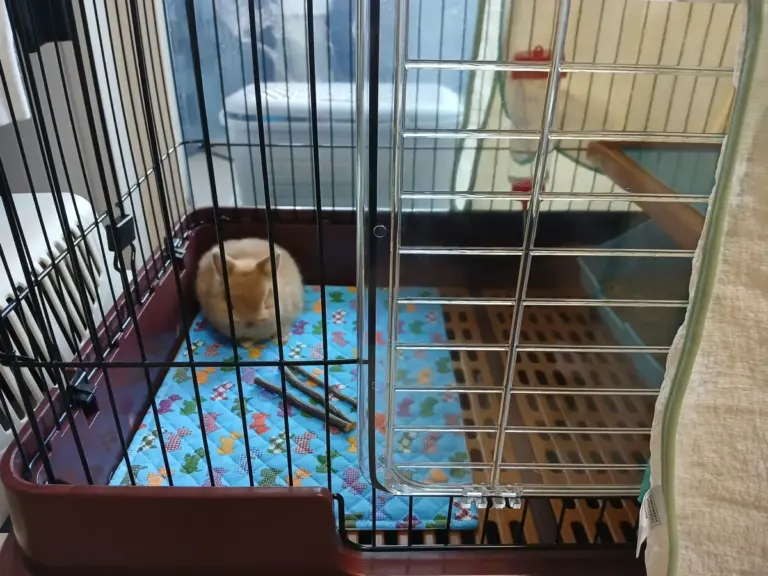
Like most first-time owners, I started with the pet store default: a cage with metal bars on a plastic base. His very first photos at home are taken through those bars. It’s the housing everyone buys before they understand what they’re buying it for — and to be fair, for a brand-new, palm-sized rabbit, it did its job.
It just doesn’t stay adequate. A cage that size is a bedroom, not a territory. Once that clicked, the cage didn’t get demoted to storage — it went out entirely, and I decided to build his space instead of buying it.
Era 2: the wire grid pen (looks right, isn’t)

Build attempt number one: a pen assembled from those wire grid panels that clip together — the modular squares that are the default result of every “DIY rabbit pen” search. Cheap, quick to assemble, easy to reshape. I used them for months, and they do technically contain a rabbit.
Here’s what the product photos don’t show: those panels are full of holes, and everything a rabbit produces goes straight through them. Fur drifts through. Hay scatter ends up outside the pen as much as inside. The pen defined his space, but it did nothing to protect mine — the mess field simply continued through the walls as if they weren’t there.
And then he beat the walls entirely. My rabbit figured out that the hay feeder doubled as a launchpad: hop onto the feeder, jump the wall, done. I stacked the grids two panels high — he cleared them anyway, more than once. Beyond the jailbreak itself, the landings worried me: that’s a real drop for a dwarf rabbit’s joints, taken at whatever angle he happened to launch at.
Era 3: the free-roam experiment
The obvious counter was a third tier of panels. But a wall high enough to be rabbit-proof is also high enough to be me-proof — I couldn’t have stepped in to sit with him anymore, and a pen I can’t hang out in defeats half the purpose. So instead of building the wall higher, I tore it down: no walls at all. He free roamed the room for about a year. That era got its own post, but the one-line summary: the good parts were real, the costs added up, and I eventually wanted a defined territory for him again — except this time, having lived with a cage, a grid pen, and an escape artist, I knew exactly what the walls had to do: actually be walls.
Era 4: opaque panels, two tiers, partial ceiling — the keeper
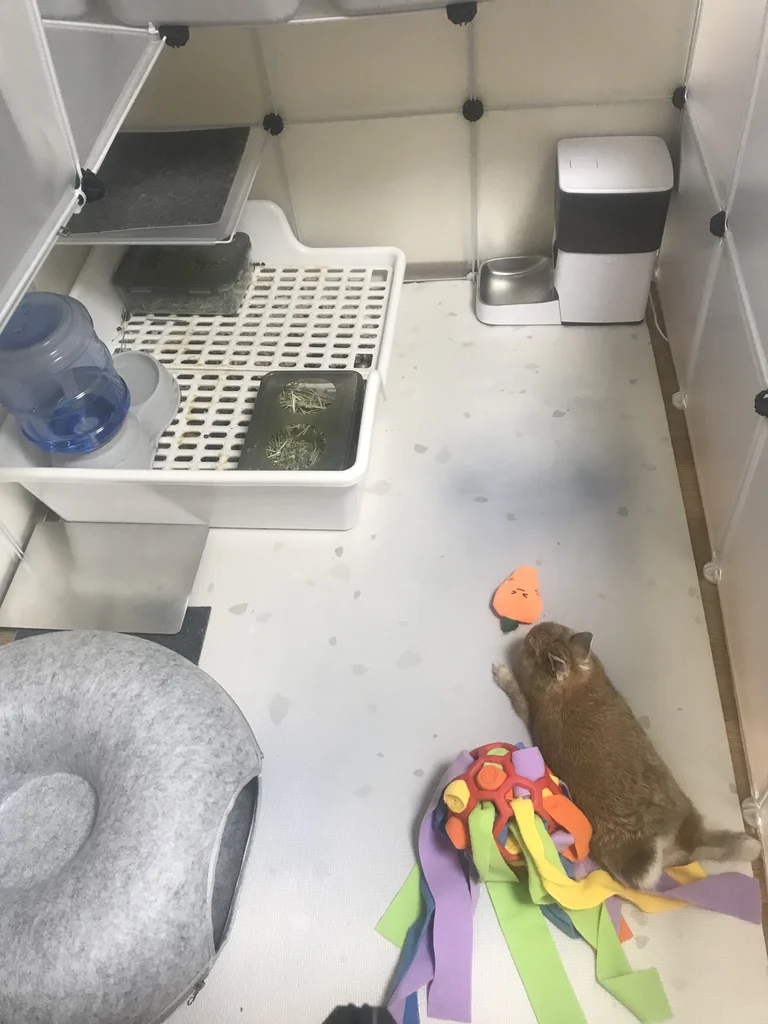
The fix turned out to be a different panel, not a different concept: solid opaque square panels — a frosted plastic sheet in a steel-reinforced frame — connected the same modular way as the wire grids. Mine are 45 cm squares, laid out 3 panels by 4 for the footprint, which lands the enclosure at roughly 1.4 by 1.8 meters of floor. Because the system is modular, that shape was my decision, not the box’s.
And this is where “playpen” stops being the right word, because the same squares kept going:
- The walls are two panels tall. Around 90 cm of solid wall — high enough that the top half of the enclosure is his skyline, not my furniture.
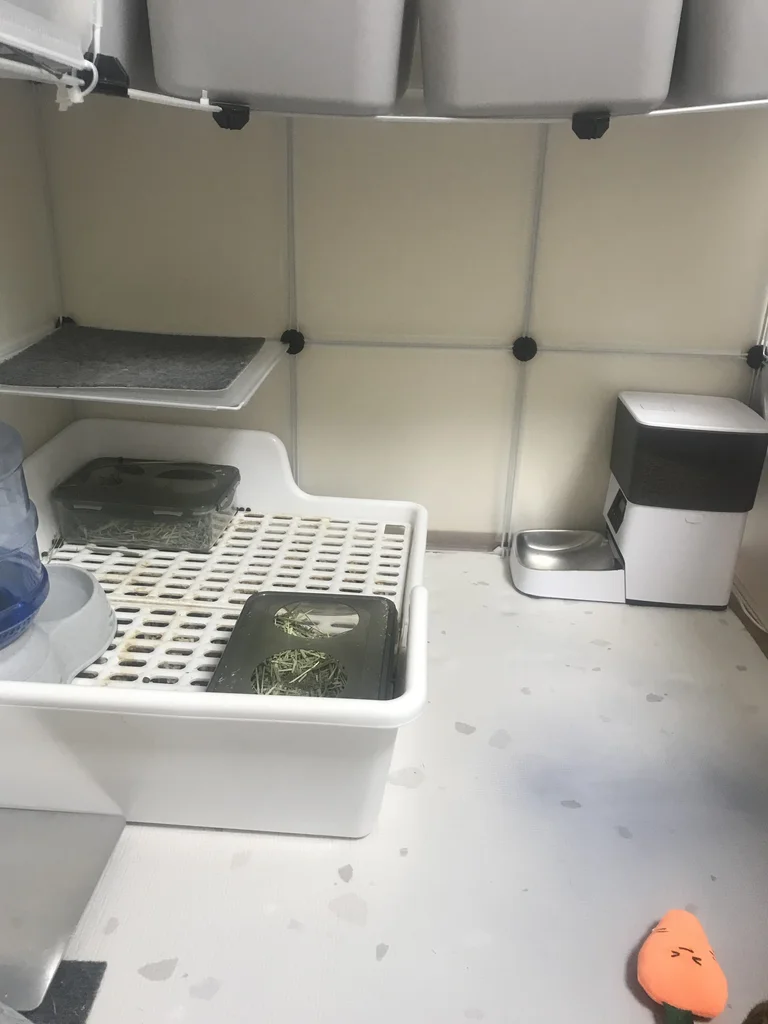
- Part of the top is a ceiling. The same panels clip on overhead, covering a section of the enclosure while the rest stays open — an open-air room with a sheltered corner, not a sealed box. After the feeder-launchpad episodes of era two, I also wasn’t going to trust wall height alone. And a bonus I now use daily: the covered section is a shelf. My own household stuff lives on his roof — the enclosure pays rent in storage space.
- There’s a mezzanine. One extra panel mounted flat between the first and second wall tier makes a small platform. He hops up and down it constantly — drop a treat on it and he’s up there before the panel stops wobbling.
- A real door. A fully metal mesh door panel is compatible with the same connectors, so the enclosure opens properly instead of me lifting a wall out.
The connector trick: zip ties
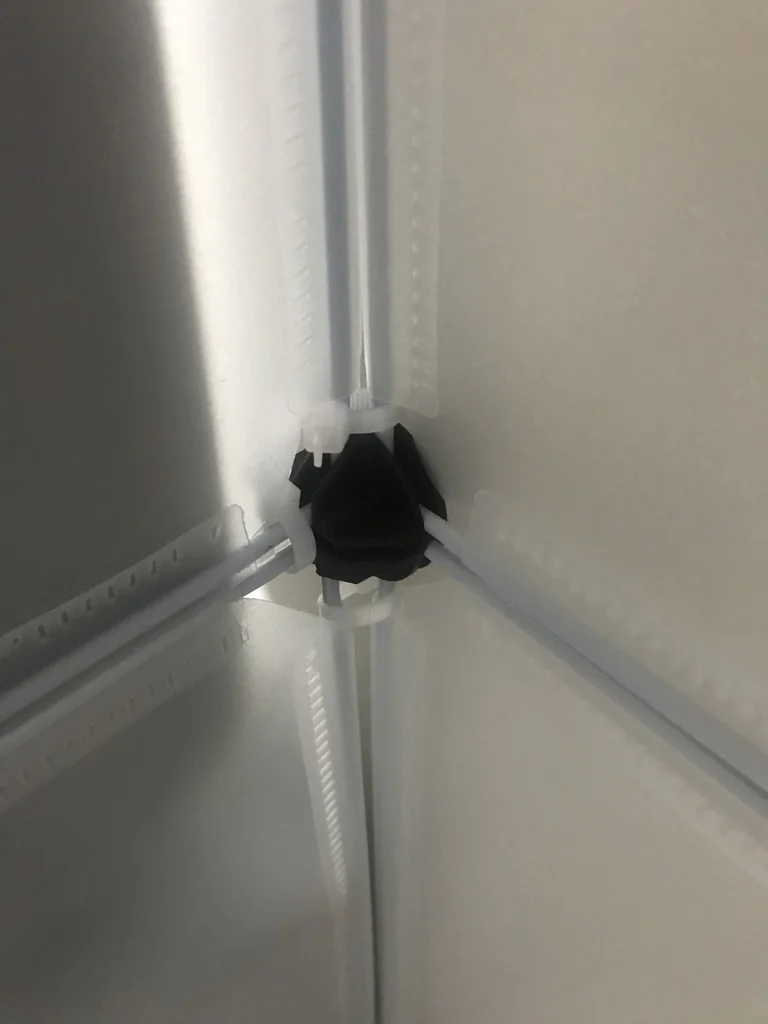
The panels join with small round plastic connectors at each corner — that part is standard. The upgrade that made the whole structure feel permanent cost almost nothing: after clipping each joint, I cinched it with a cable tie.
Connectors alone hold the shape, but they can flex or pop under a determined shove, and a popped joint means a gap with hard plastic edges. Zip-tied, every joint is locked solid — the wall doesn’t rack, the ceiling panels don’t lift, and there’s nothing loose for a rabbit to work on. It’s a one-minute job per wall and it turns furniture-grade panels into an actual structure.
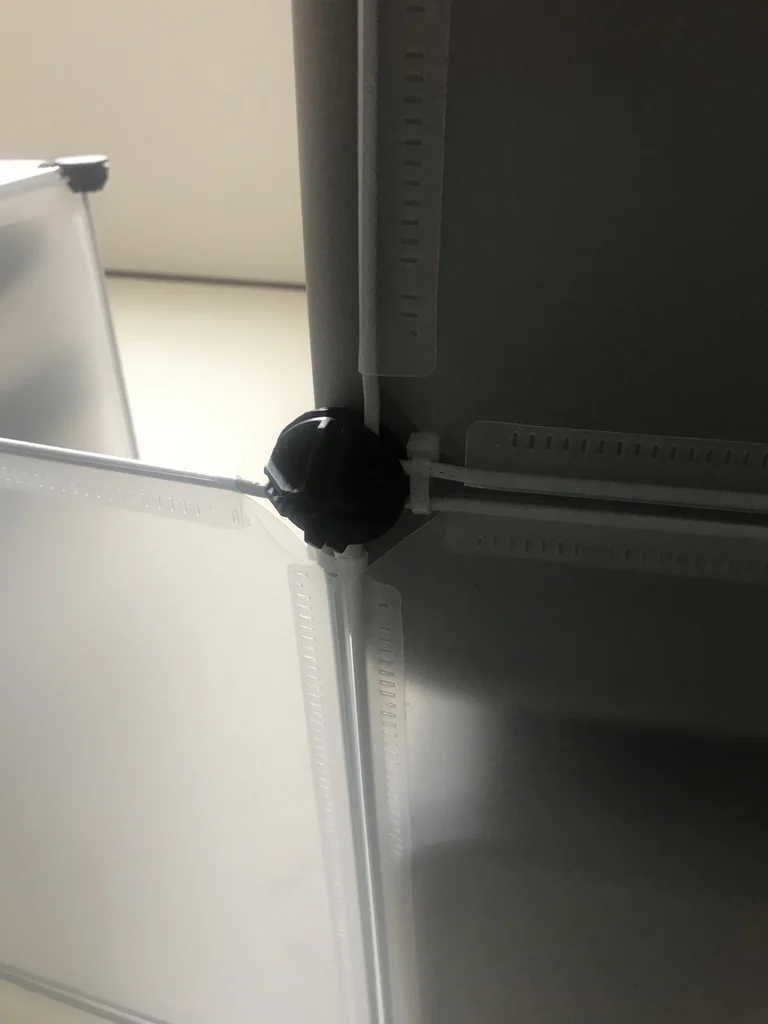
The same joints take accessories, too: the all-metal door panel clips in with identical connectors, so “modular” keeps meaning something after the walls go up.
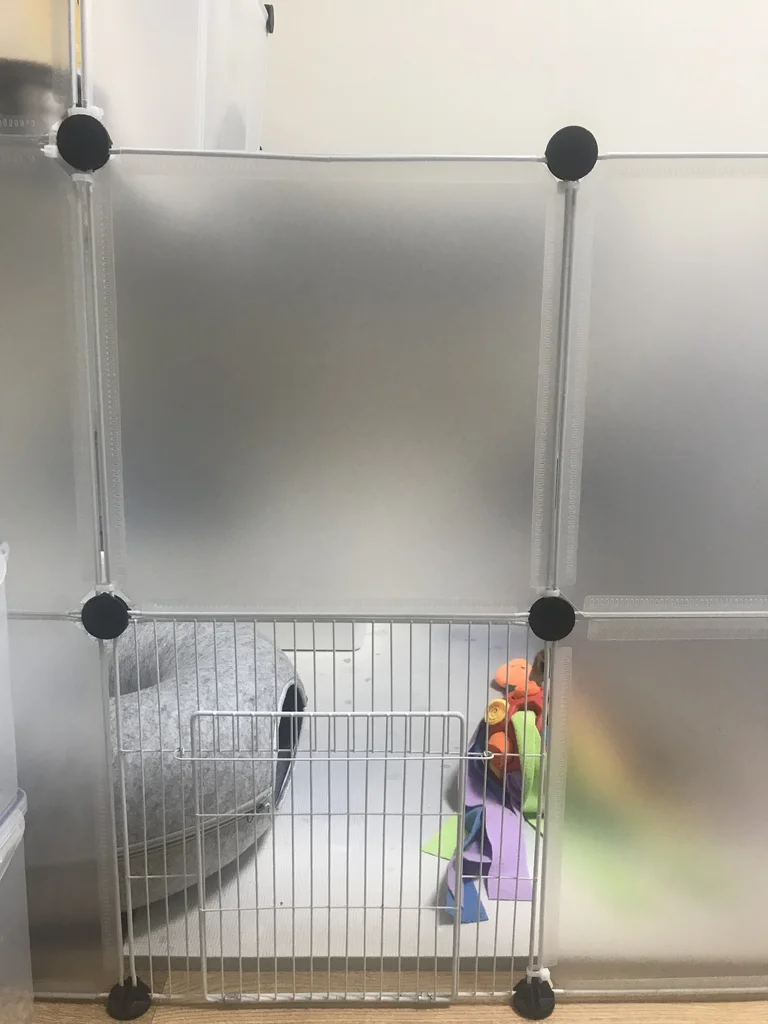
What changed, concretely
- The mess stays home. Solid walls stop fur and hay at the boundary. The room outside the enclosure went back to being a human room.
- The shape fits the room, not the box. Modular squares mean the enclosure wraps the space you have — corner cuts, long runs, a platform mid-wall, whatever works.
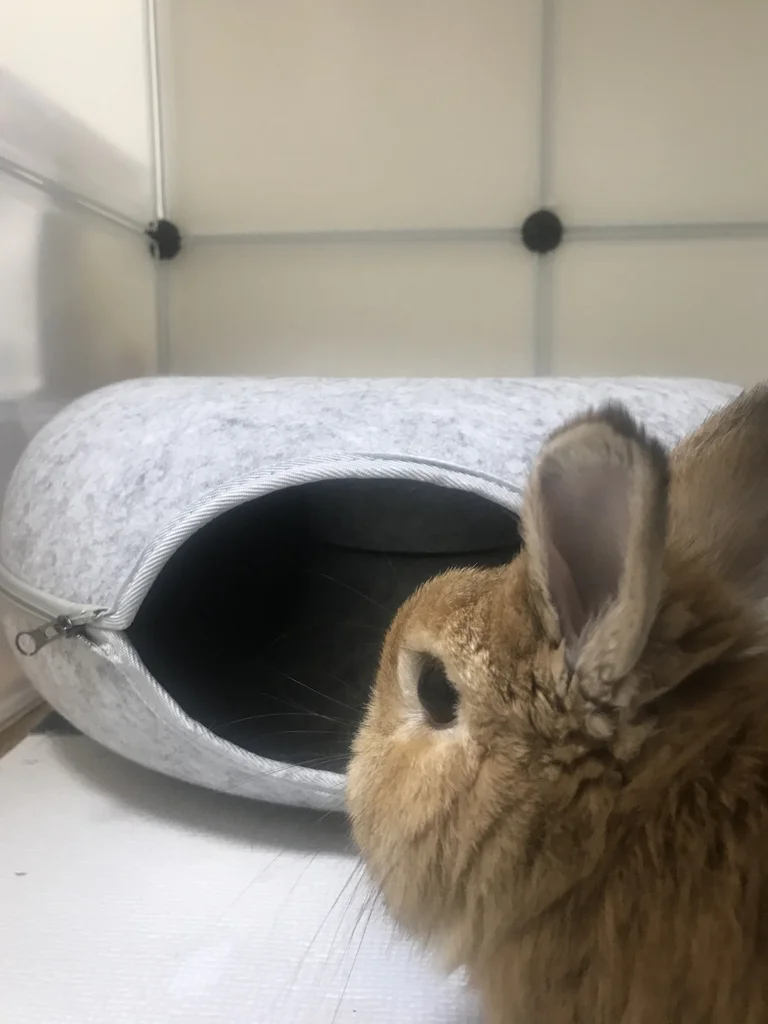
- A calmer rabbit, by the look of it. I can’t read his mind, but behind opaque walls he spends most of his downtime flopped flat — the household walking past is scenery he opted out of. He recently got a felt donut-shaped hideout inside the enclosure, and his favorite move is flopping inside it: a den within a den. Rabbits are prey animals; sheltered territory is the point.
- Everything has its station. Inside: litter box, hay feeder, water dispenser, and open floor to flop on — cushion-matted, for his padless feet. A defined territory turned out to organize all the other gear decisions too.
Upkeep: the platform tax
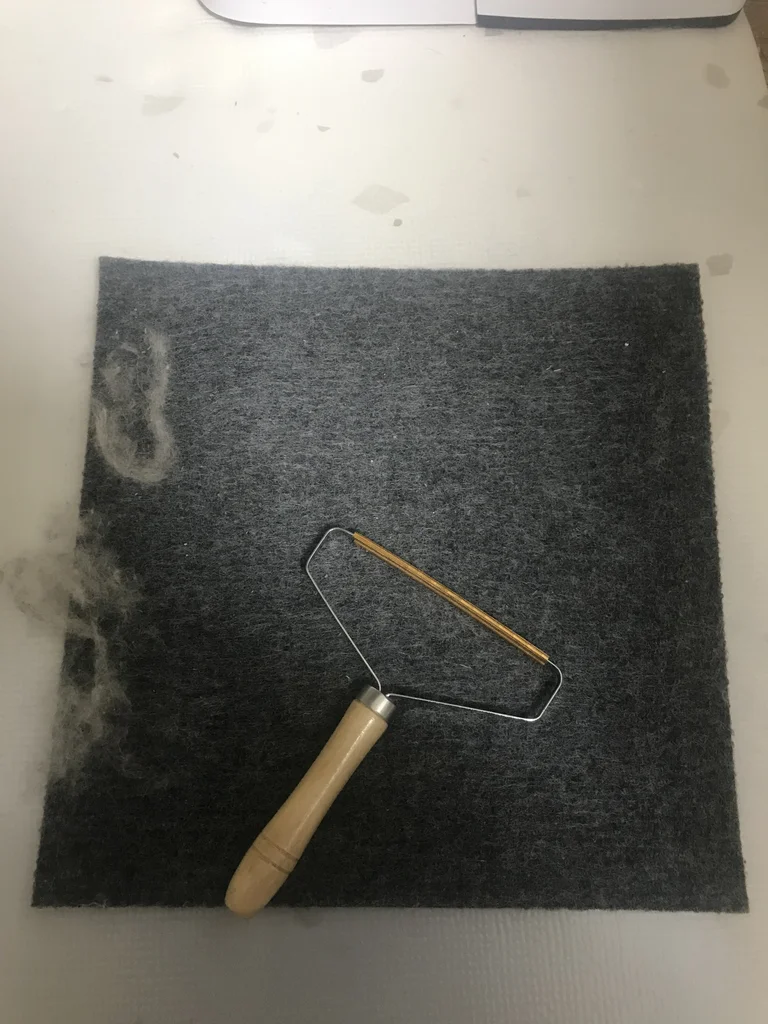
One honest cost of the mezzanine: it’s carpeted (a loose carpet tile, for grip), and carpet collects fur like it’s paid to. A cheap manual lint scraper clears it in under a minute, and the tile lifts out entirely on deep-clean days. If you’re wondering how often that actually happens — litter training does most of the cleaning for you.
If you’re buying (or building) today
Four housing eras compress into this checklist:
- Skip the wire grid pen unless containing mess doesn’t matter to you. It’s the most commonly recommended product and the least effective wall.
- Buy opaque modular panels — you’re really buying a wall system, not a pen. Shape it to your room.
- Zip-tie every joint. The connectors are the weak point; a bag of cable ties makes the structure rigid and chew-safe for pocket change.
- Go taller than you think — and consider a partial ceiling. A motivated rabbit treats low walls as a suggestion; mine used the hay feeder as a step stool and cleared a two-tier wall. But endless height isn’t the answer either — a wall you can’t step over is a pen you can’t sit in. Two tiers plus a covered section is where containment and hanging out with your rabbit stop fighting each other.
- Size it like a room, not a cage. The enclosure is his whole default world — floor space for full stretches, sprints, and a flop zone is the spec, not a luxury.
The bottom line
A rabbit doesn’t need free run of your home, and he definitely doesn’t need a cage. What he needs is a territory — defined, roomy, and calm. Opaque DIY panels turned out to be the cheapest way to build exactly that: shaped to our room, two tiers tall, part-roofed, with a treat platform he actually uses and walls that actually work as walls. Era four is the one that stuck; I don’t expect an era five.
This post is part of my complete rabbit setup — a tour of everything currently in his enclosure and why each item survived.